

Test-Driven Development: #2 Login Validations

I am an iOS Developer from Egypt, Cairo who likes Apple Products and UX studies
I enjoy reading about Entreprenuership and Scrum.
When no one is looking, I like to play around with Figma and build tools/ideas to help me during get things done quickly.
And I keep repeating epic gaming moments over and over again in my head and repeat narratives out loud in my room to regain a glimpse of how it felt when I first saw it (without altering the script)
Last Post, We talked about the importance of TDD, but how do we do TDD in the first place?
This is what we will be talking about in this post, so let's get started!
Before we start am going to put the TDD principles we talked about so that we conform to them when building our example
The TDD Principles
- You are not allowed to write any production code until you cover it with a failing test
- You are not allowed to write more of a unit test than that is sufficient to fail and compile error is considered as a failing test
- You are not allowed to write more production code than that is sufficient to make the failing test to pass
Feature Requirements
TDD starts with the Requirements and Acceptance Criteria, I prepared a dummy requirement for a basic feature of Login.
So our feature request comes like this
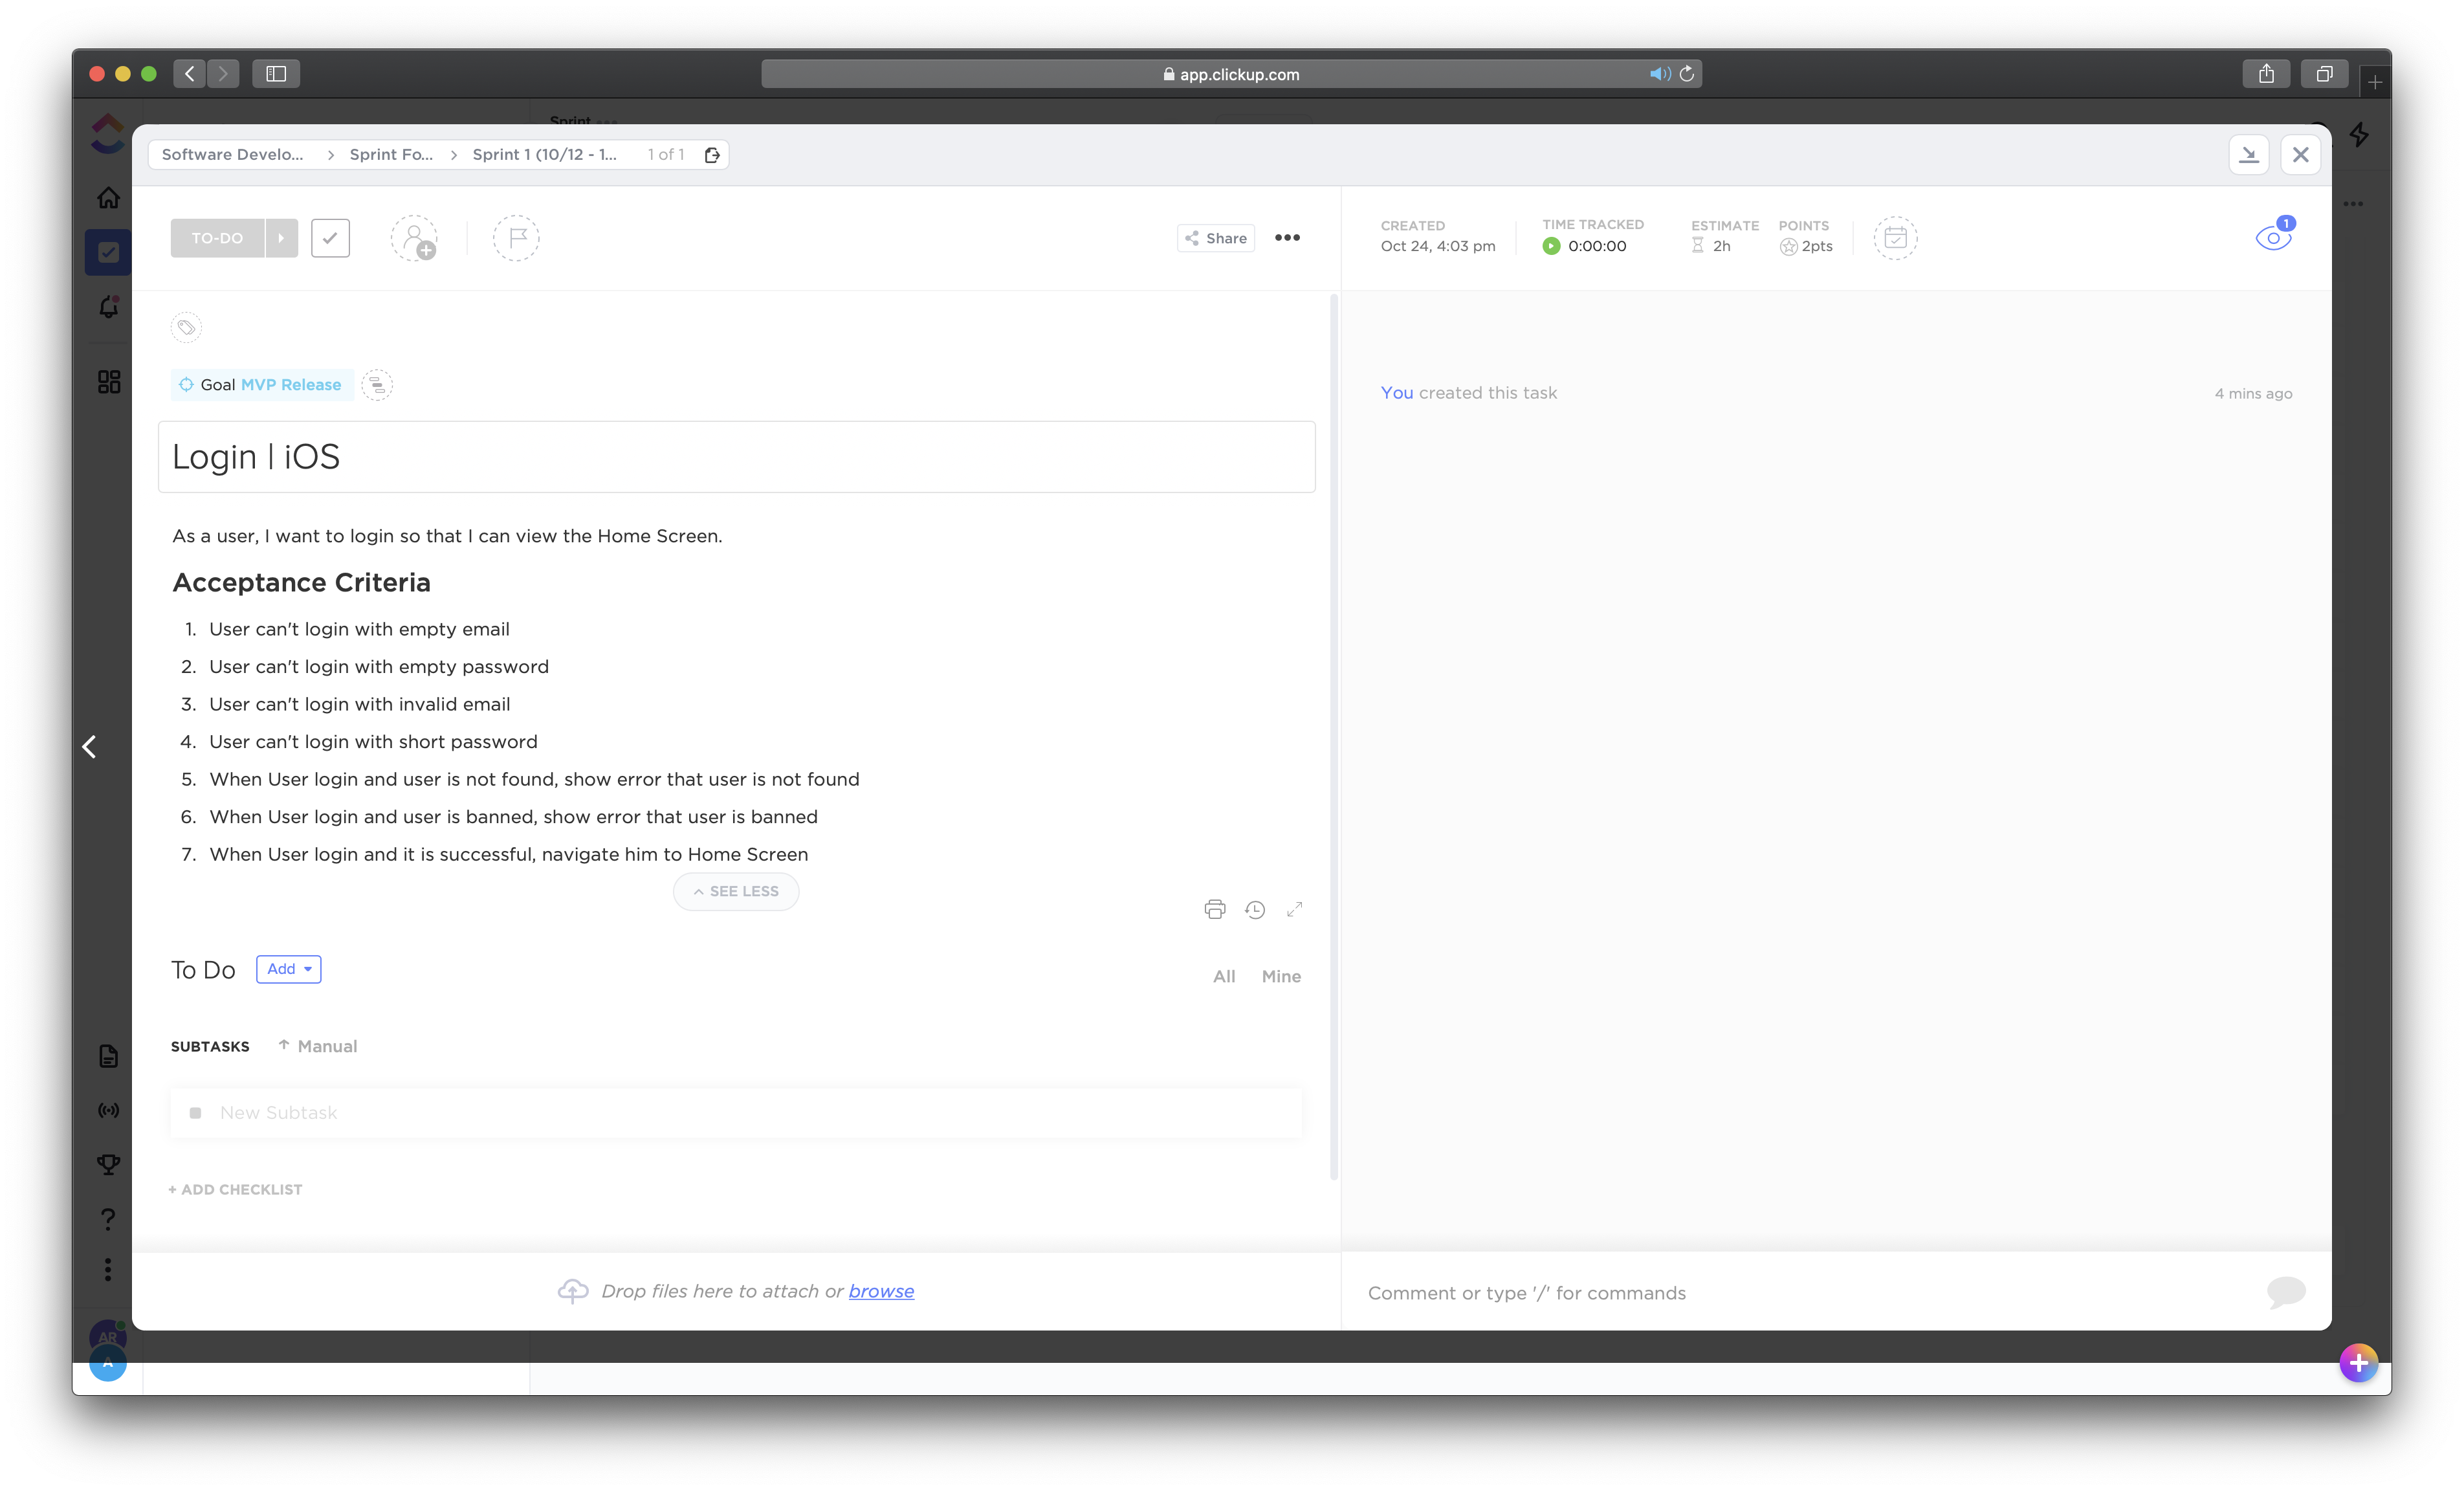
We read the description and know that we want a login screen that conforms to the acceptance criteria
So, In TDD, we will start to write our first test which is if a user tries to log in without writing the email, it won't allow him while showing an error...
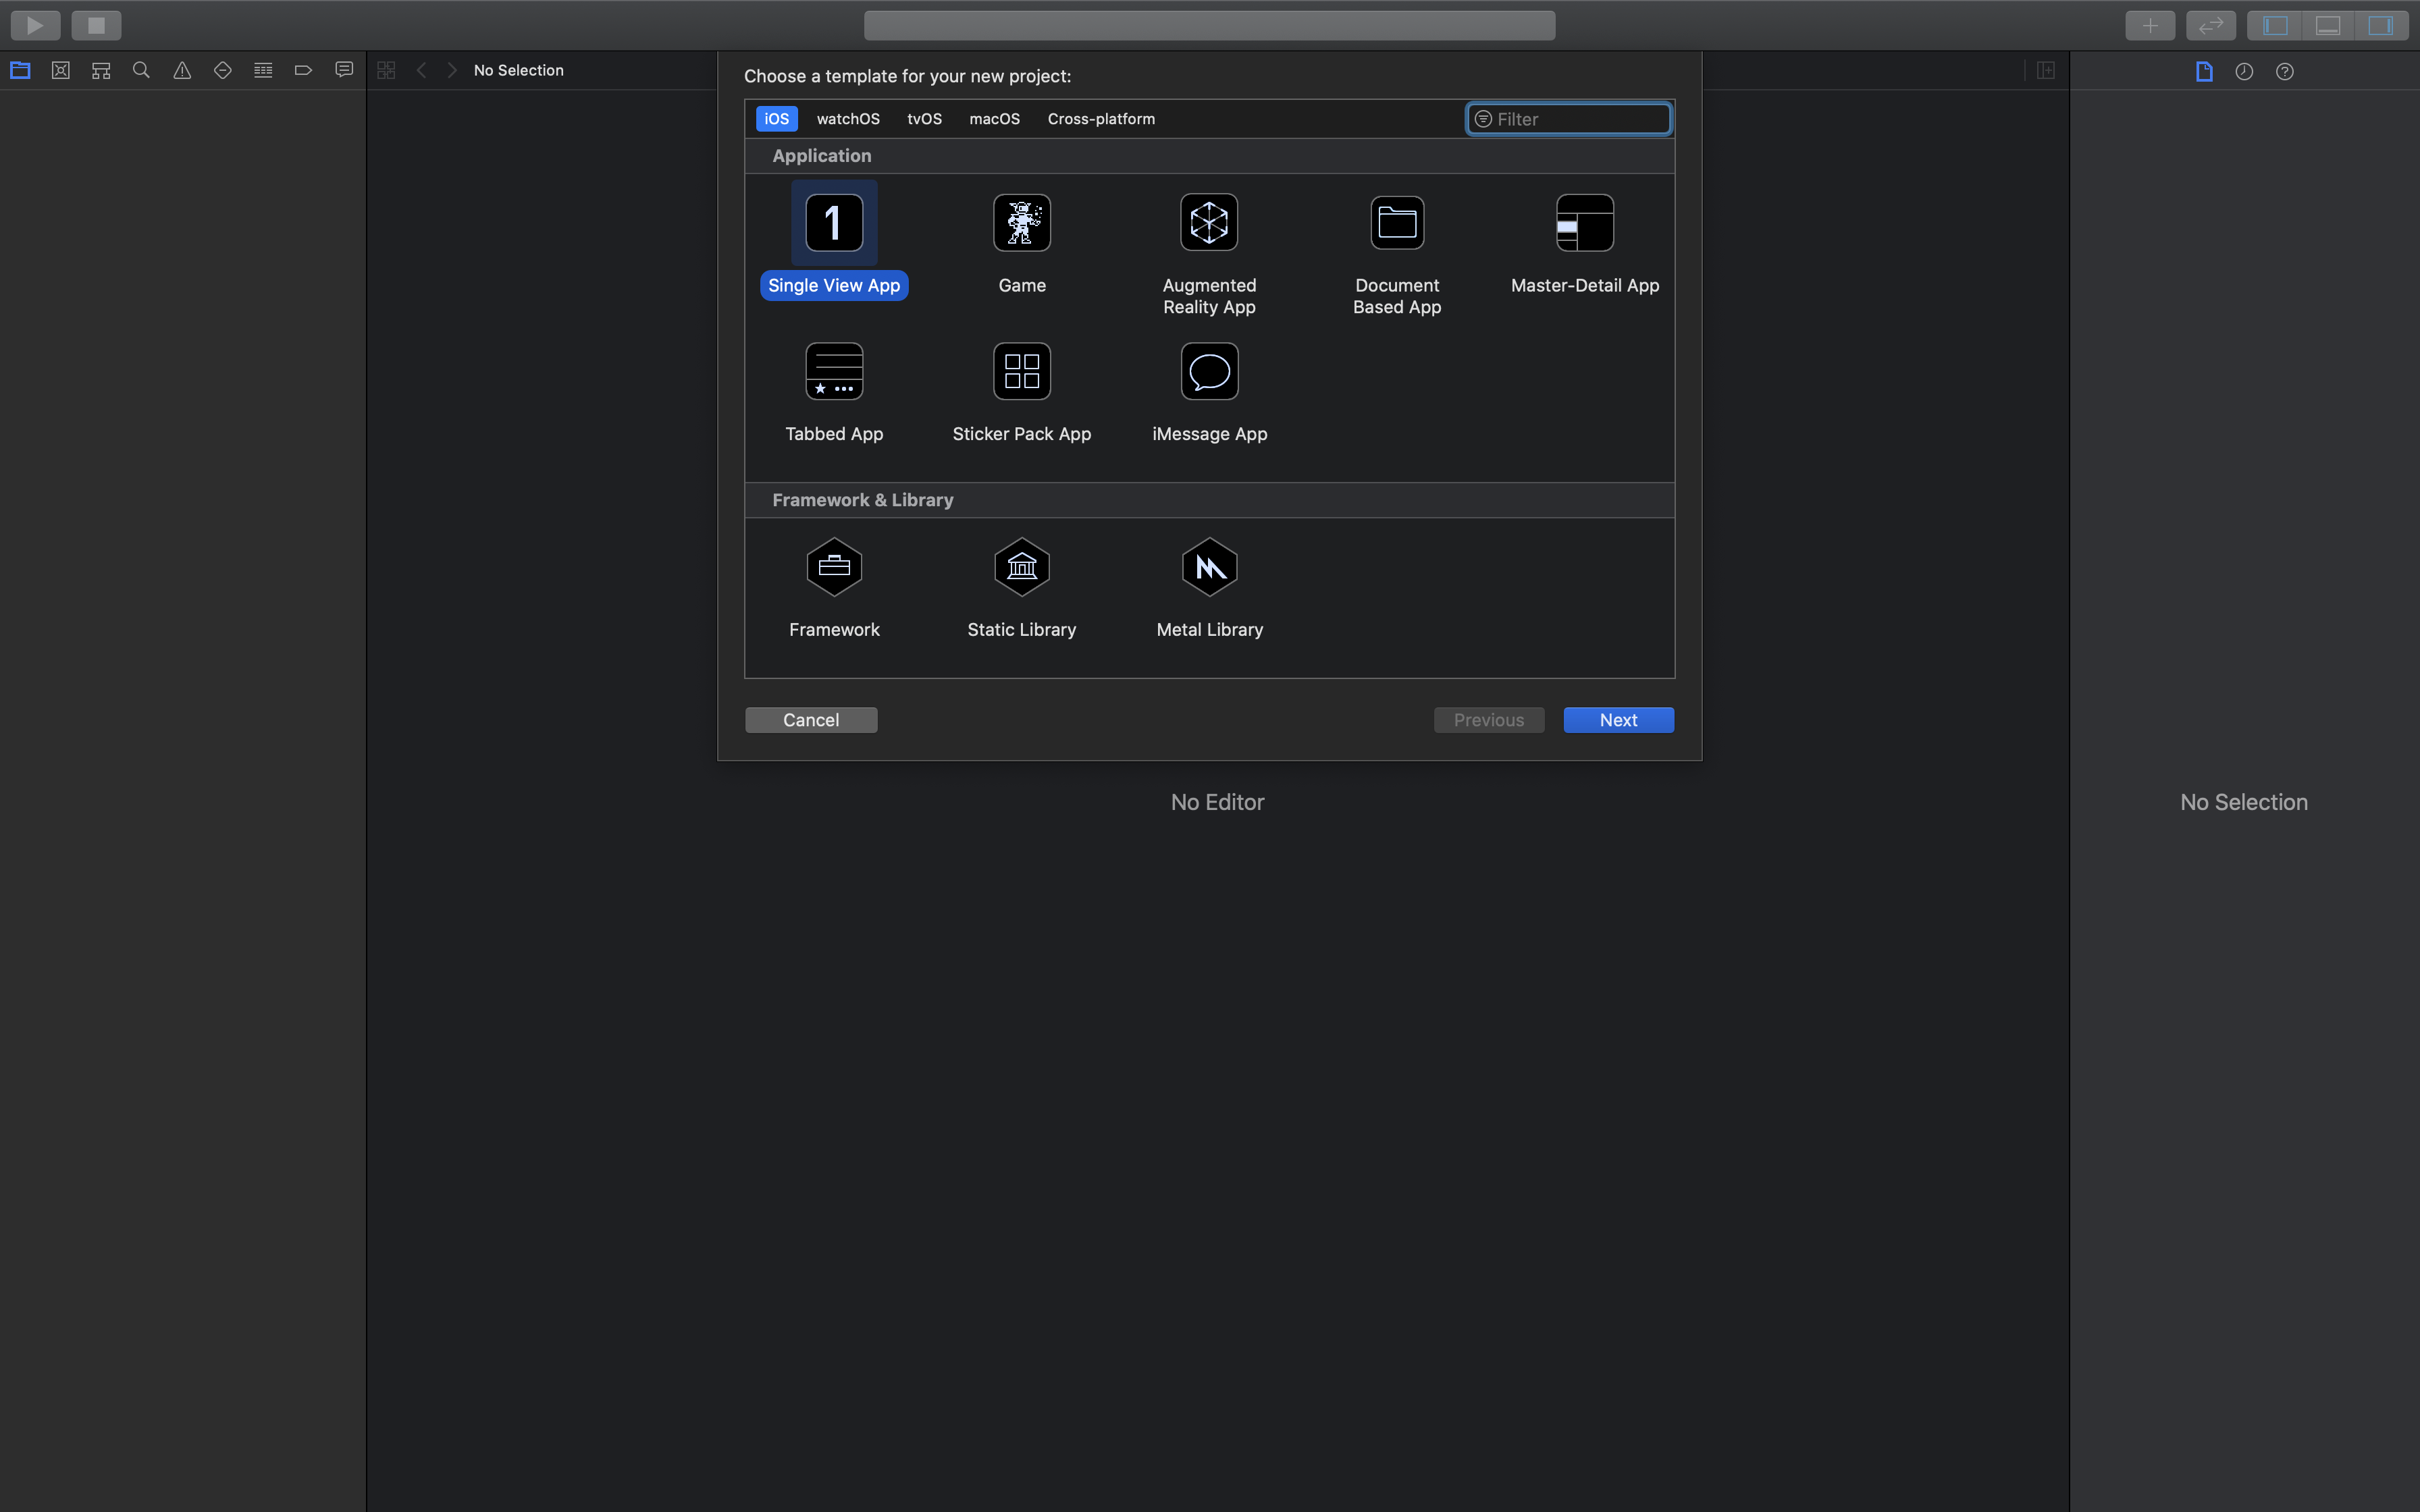
First, let's create a new Project
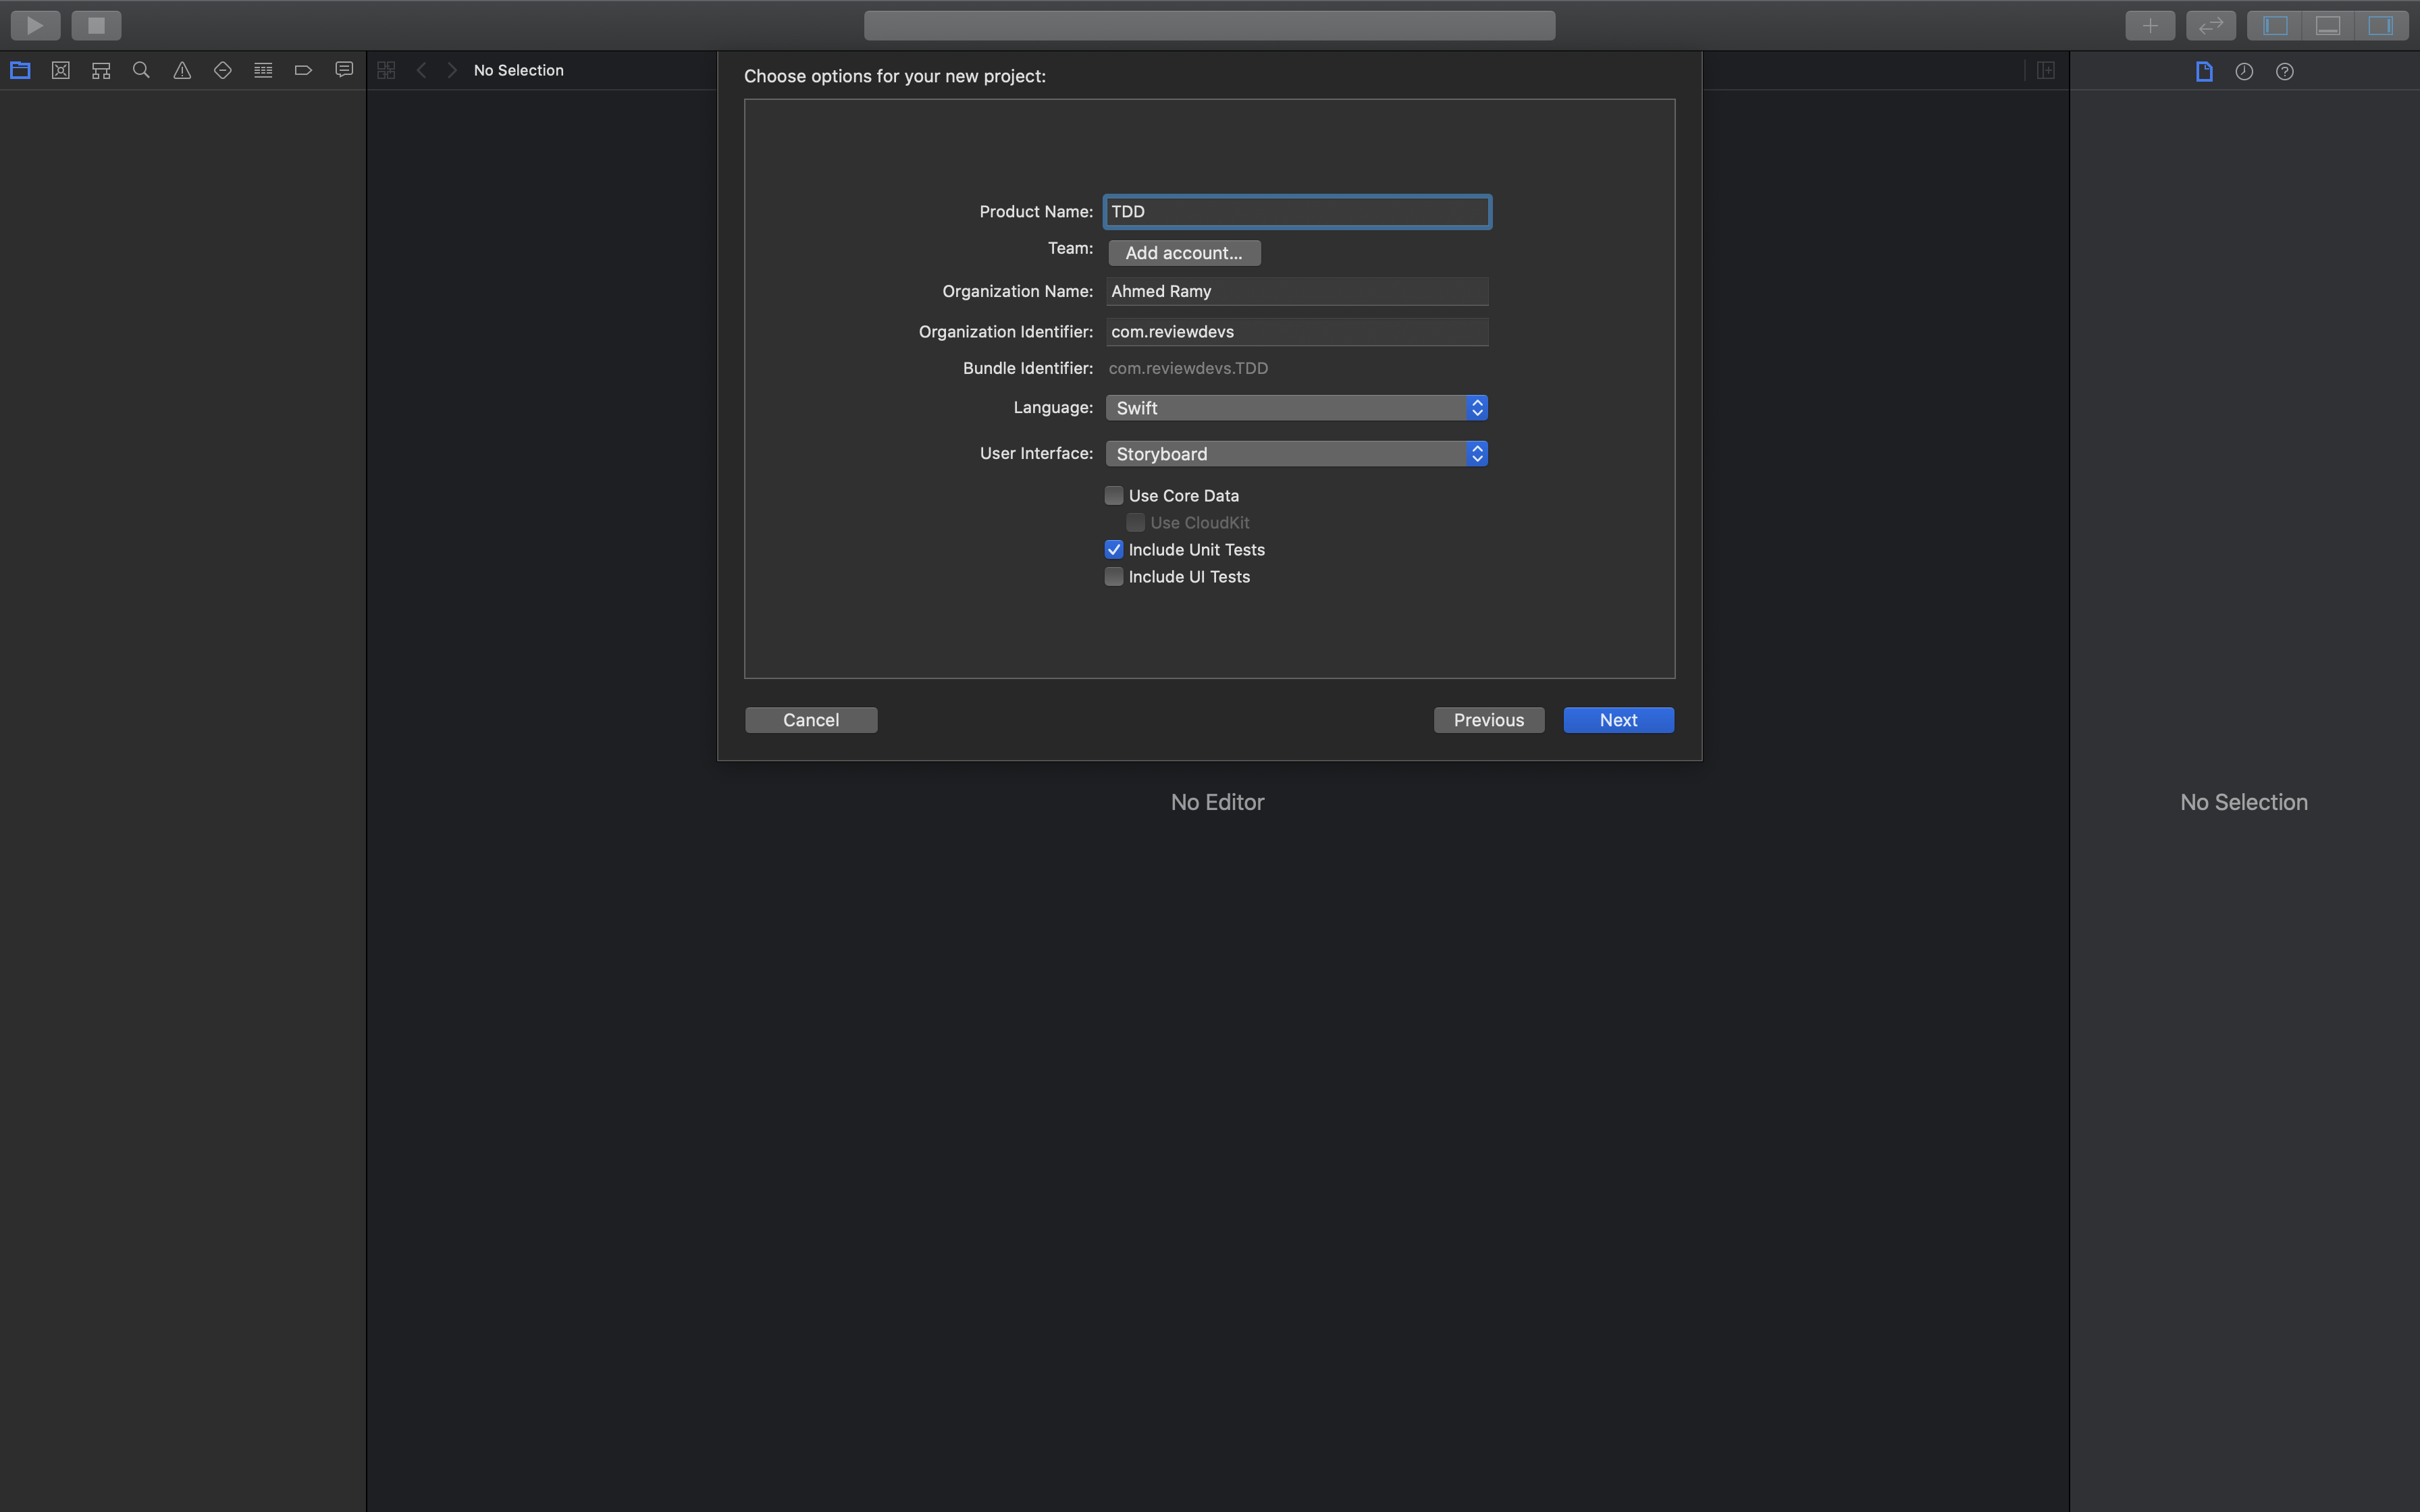
Then Enable "Include Unit Tests" and Set User Interface into "Storyboard"
Now that our project is created, We won't write any production code, instead, we will write our tests first!
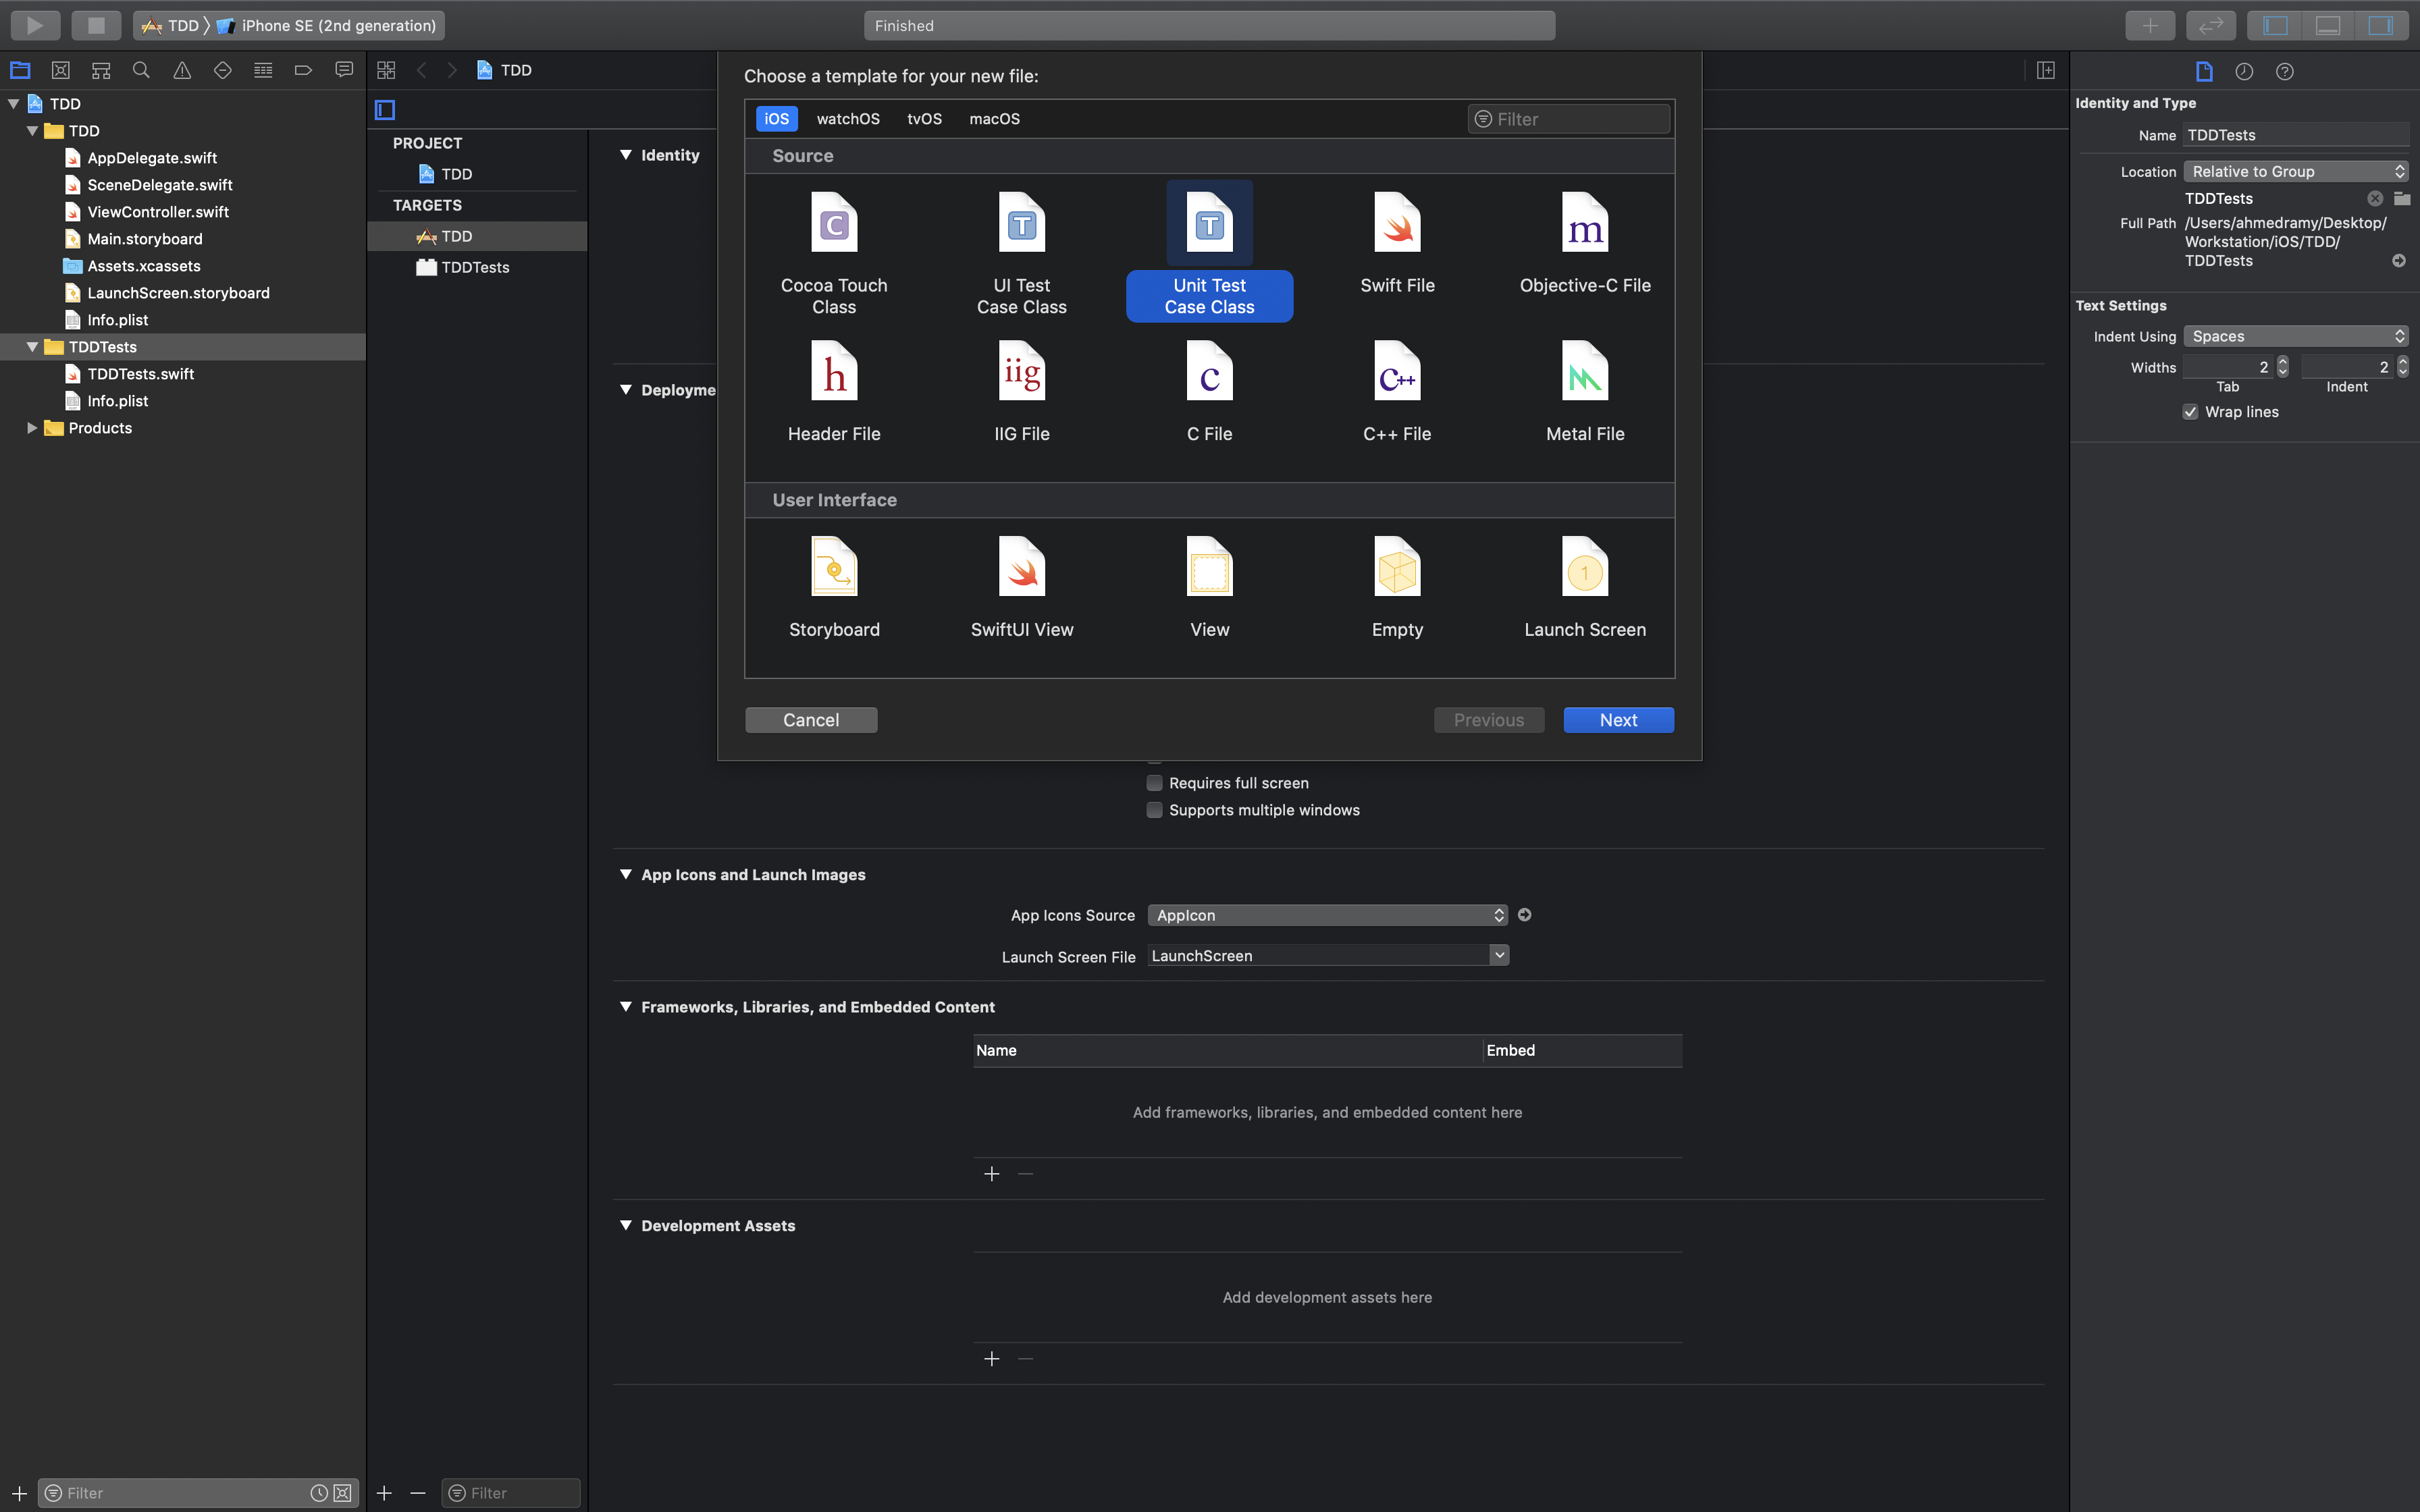
let's create a unit test file and call it "LoginViewModelTests"
import XCTest
// #1
@testable import TDD

class LoginViewModelTests: XCTestCase {

  // #2
  var sut: LoginViewModel!

  override func setUp() {
    super.setUp()
    // #3
    sut = LoginViewModel()
  }

  override func tearDown() {
    super.tearDown()
    // #4
    sut = nil
  }
}
Then we will prepare the file to write our first test!
- Import our application module with the
@testableannotation - Declare our Subject Under test which is in this case, our ViewModel, which will be doing most of the work
- Before every test we create a new instance of the ViewModel
- After every test we destroy that ViewModel instance to make sure every new test has a clean environment
Now we just create an empty file with nothing but an empty class called LoginViewModel to satisfy our test.
I decided to put it in this structure Authentication/Login/LoginViewModel.swift, but you are free to place it anywhere
import Foundation

public class LoginViewModel {

}
Build and compile our tests, we will find out that the Tests now compile without a problem, which allows us to write our first actual test.
Our first point in our acceptance criteria is that a user is not allowed to login if he didn't fill up the email field, so let's write a test for that
func test_GivenEmptyEmail_WhenLogin_ShowError() {
  // Given
  let email = ""
  let password = ""

  // When
  sut.login(email: email, password: password)

  // Then
    // Assert there is "Email can't be empty." error
}
We start our test with a given section, which in this case, we are given an empty email and password, ignoring the password, for now, we feed that email to the sut through a non-existing function called login(email: String, password: String), then we will assert if there are any errors produced
So we begin to write only what suffices to write a failing test, meaning that we will write the login function first, then write our assertion.
Now since our test fails due to a compile error, we now set to fix it.
Open LoginViewModel.swift
func login(email: String, password: String) {

}
We declare our function without writing anything in it, and If we build and run the test target, it will compile without a problem
Back to our test
func test_GivenEmptyEmail_WhenLogin_ShowError() {
  // Given
  let email = ""
  let password = ""

  // When
  sut.login(email: email, password: password)

  // Then
  XCTAssertTrue(sut.validationErrors.contains(ValidationError.emailIsEmpty)) // <- ADDED
}
We add the assert that there is an empty email error generated after the user has tried to login without writing an email
Now it's time to make our test finally pass
First, let's create our ValidationError enum which will hold all our possible ValidationErrors
I decided to put the file in here Business/Errors/ValidationError but you are free to put it anywhere
import Foundation

// #1
public enum ValidationError: Error {
  case emailIsEmpty
}

// #2
extension ValidationError: LocalizedError {
  // #3
  public var errorDescription: String? {
    // #4
    switch self {
    case .emailIsEmpty:
      // #5
      return "Email can't be empty" // #6
    }
  }
}
- We declare a new enum and make it conform to the
Errorprotocol - We extend that enum to conform to the
LocalizedErrorso we have access to APIs likeerror.localizedDescriptionthat works for any language - We override
errorDescriptionwhich what will be showing to the user when sees this error - We switch over the self to see what error should we present
- We return the text we should present the user with here
- We can use a key here that points to a localized string in a
.stringsfile if we plan to localize the app
Now, let's add our email validations...
Open LoginViewModel.swift
import Foundation

public class LoginViewModel {

  public var validationErrors: [ValidationError] = [] // <- Added

  func login(email: String, password: String) {

  }
}
Now if we run our tests, it should compile, but it will fail because we haven't tell it that if an email is empty, that counts as an error, so let's do just that.
func login(email: String, password: String) {
  if email.isEmpty {
    validationErrors.append(.emailIsEmpty)
  }
}
Congratulations! Now we should be having our first passing test!
I won't do all the validation tests, but I hope you got a little taste of what TDD looks like
Now let's integrate our ViewModel with an actual ViewController to complete the cycle
This is how our simple login form looks likes
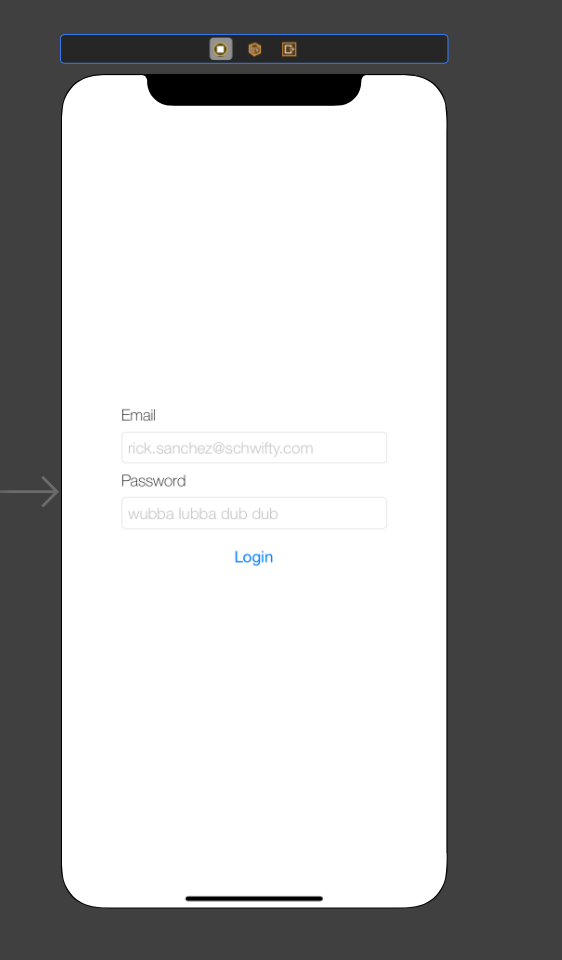
And this is the code
import UIKit

class ViewController: UIViewController {

  @IBOutlet private weak var emailTextField: UITextField!
  @IBOutlet private weak var passwordTextField: UITextField!

  private lazy var viewModel = LoginViewModel()

  @IBAction func didTapLogin() {
    viewModel.login(
      email: emailTextField.text ?? "",
      password: passwordTextField.text ?? ""
    )
  }
}
Now that the UI part is done, let's connect our LoginViewModel with the ViewController so that it knows when an error has happened and presents the user with an error when that happens
First, we will write our test to see how exactly do we want our API to look like to the View inside our test, it can be a delegate pattern, or it can be a simple, quick callback, let's find out
func test_GivenAnError_WhenLogin_OnErrorIsCalled() {
  // Given
  let email = ""
  let password = ""

  // When
  sut.onError = { errors in
    // Then
    XCTAssertEqual(errors.first!.localizedDescription, ValidationError.emailIsEmpty.localizedDescription)
  }
  sut.login(email: email, password: password)
}
Then to make it pass...
Open LoginViewModel
import Foundation

public class LoginViewModel {

  public var validationErrors: [ValidationError] = []

    // #1
  public var onError: (([Error]) -> Void)?

  func login(email: String, password: String) {
    if email.isEmpty {
      validationErrors.append(.emailIsEmpty)
    }

    guard validationErrors.isEmpty else {
            // #2
      onError?(validationErrors)
            validationErrors.removeAll()
      return
    }
    // Do actual login here
  }
}
- We declare a callback that notifies the users of this class that an error occured
- in case of ValidationError, it stops the execution of the login method and passes the errors into the onError callback to its listener
Now that we are sure that our code works in the test, let's write it on production
class ViewController: UIViewController {

  @IBOutlet private weak var emailTextField: UITextField!
  @IBOutlet private weak var passwordTextField: UITextField!

  private lazy var viewModel = LoginViewModel()

  // --- Start Addition ---
  override func viewDidLoad() {
    super.viewDidLoad()
    viewModel.onError = { [weak self] errors in
      self?.showErrorsAlert(errors: errors)
    }
  }
  // --- End Addition ---
  @IBAction func didTapLogin() {
    viewModel.login(
      email: emailTextField.text ?? "",
      password: passwordTextField.text ?? ""
    )
  }
}

// --- Start Addition ---
private extension ViewController {
  func showErrorsAlert(errors: [Error]) {
    let alert = UIAlertController(
      title: "Oops, something went wrong.",
      message: errors.map { $0.localizedDescription }.joined(separator: "\n"),
      preferredStyle: .alert
    )

    alert.addAction(UIAlertAction(title: "Ok", style: .default, handler: nil))

    self.present(alert, animated: true, completion: nil)
  }
}
// --- End Addition ---
Now if we launch the app and test it, you will find that pressing the login button directly will present us with an alert saying, "Email can't be empty"
Conclusion
In this post, we talked about how TDD can be implemented
It's important to note that it doesn't matter which Architecture you use, what matters is how you isolate you models and classes so that they are easier to test and built upon, you will find that writing TDD and armed with a bit of knowledge of the SOLID principles will take you far into building robust applications that will scale well with you like when we wrote our business logic
If you also would like to see the code on Github, there ya go
Bonus
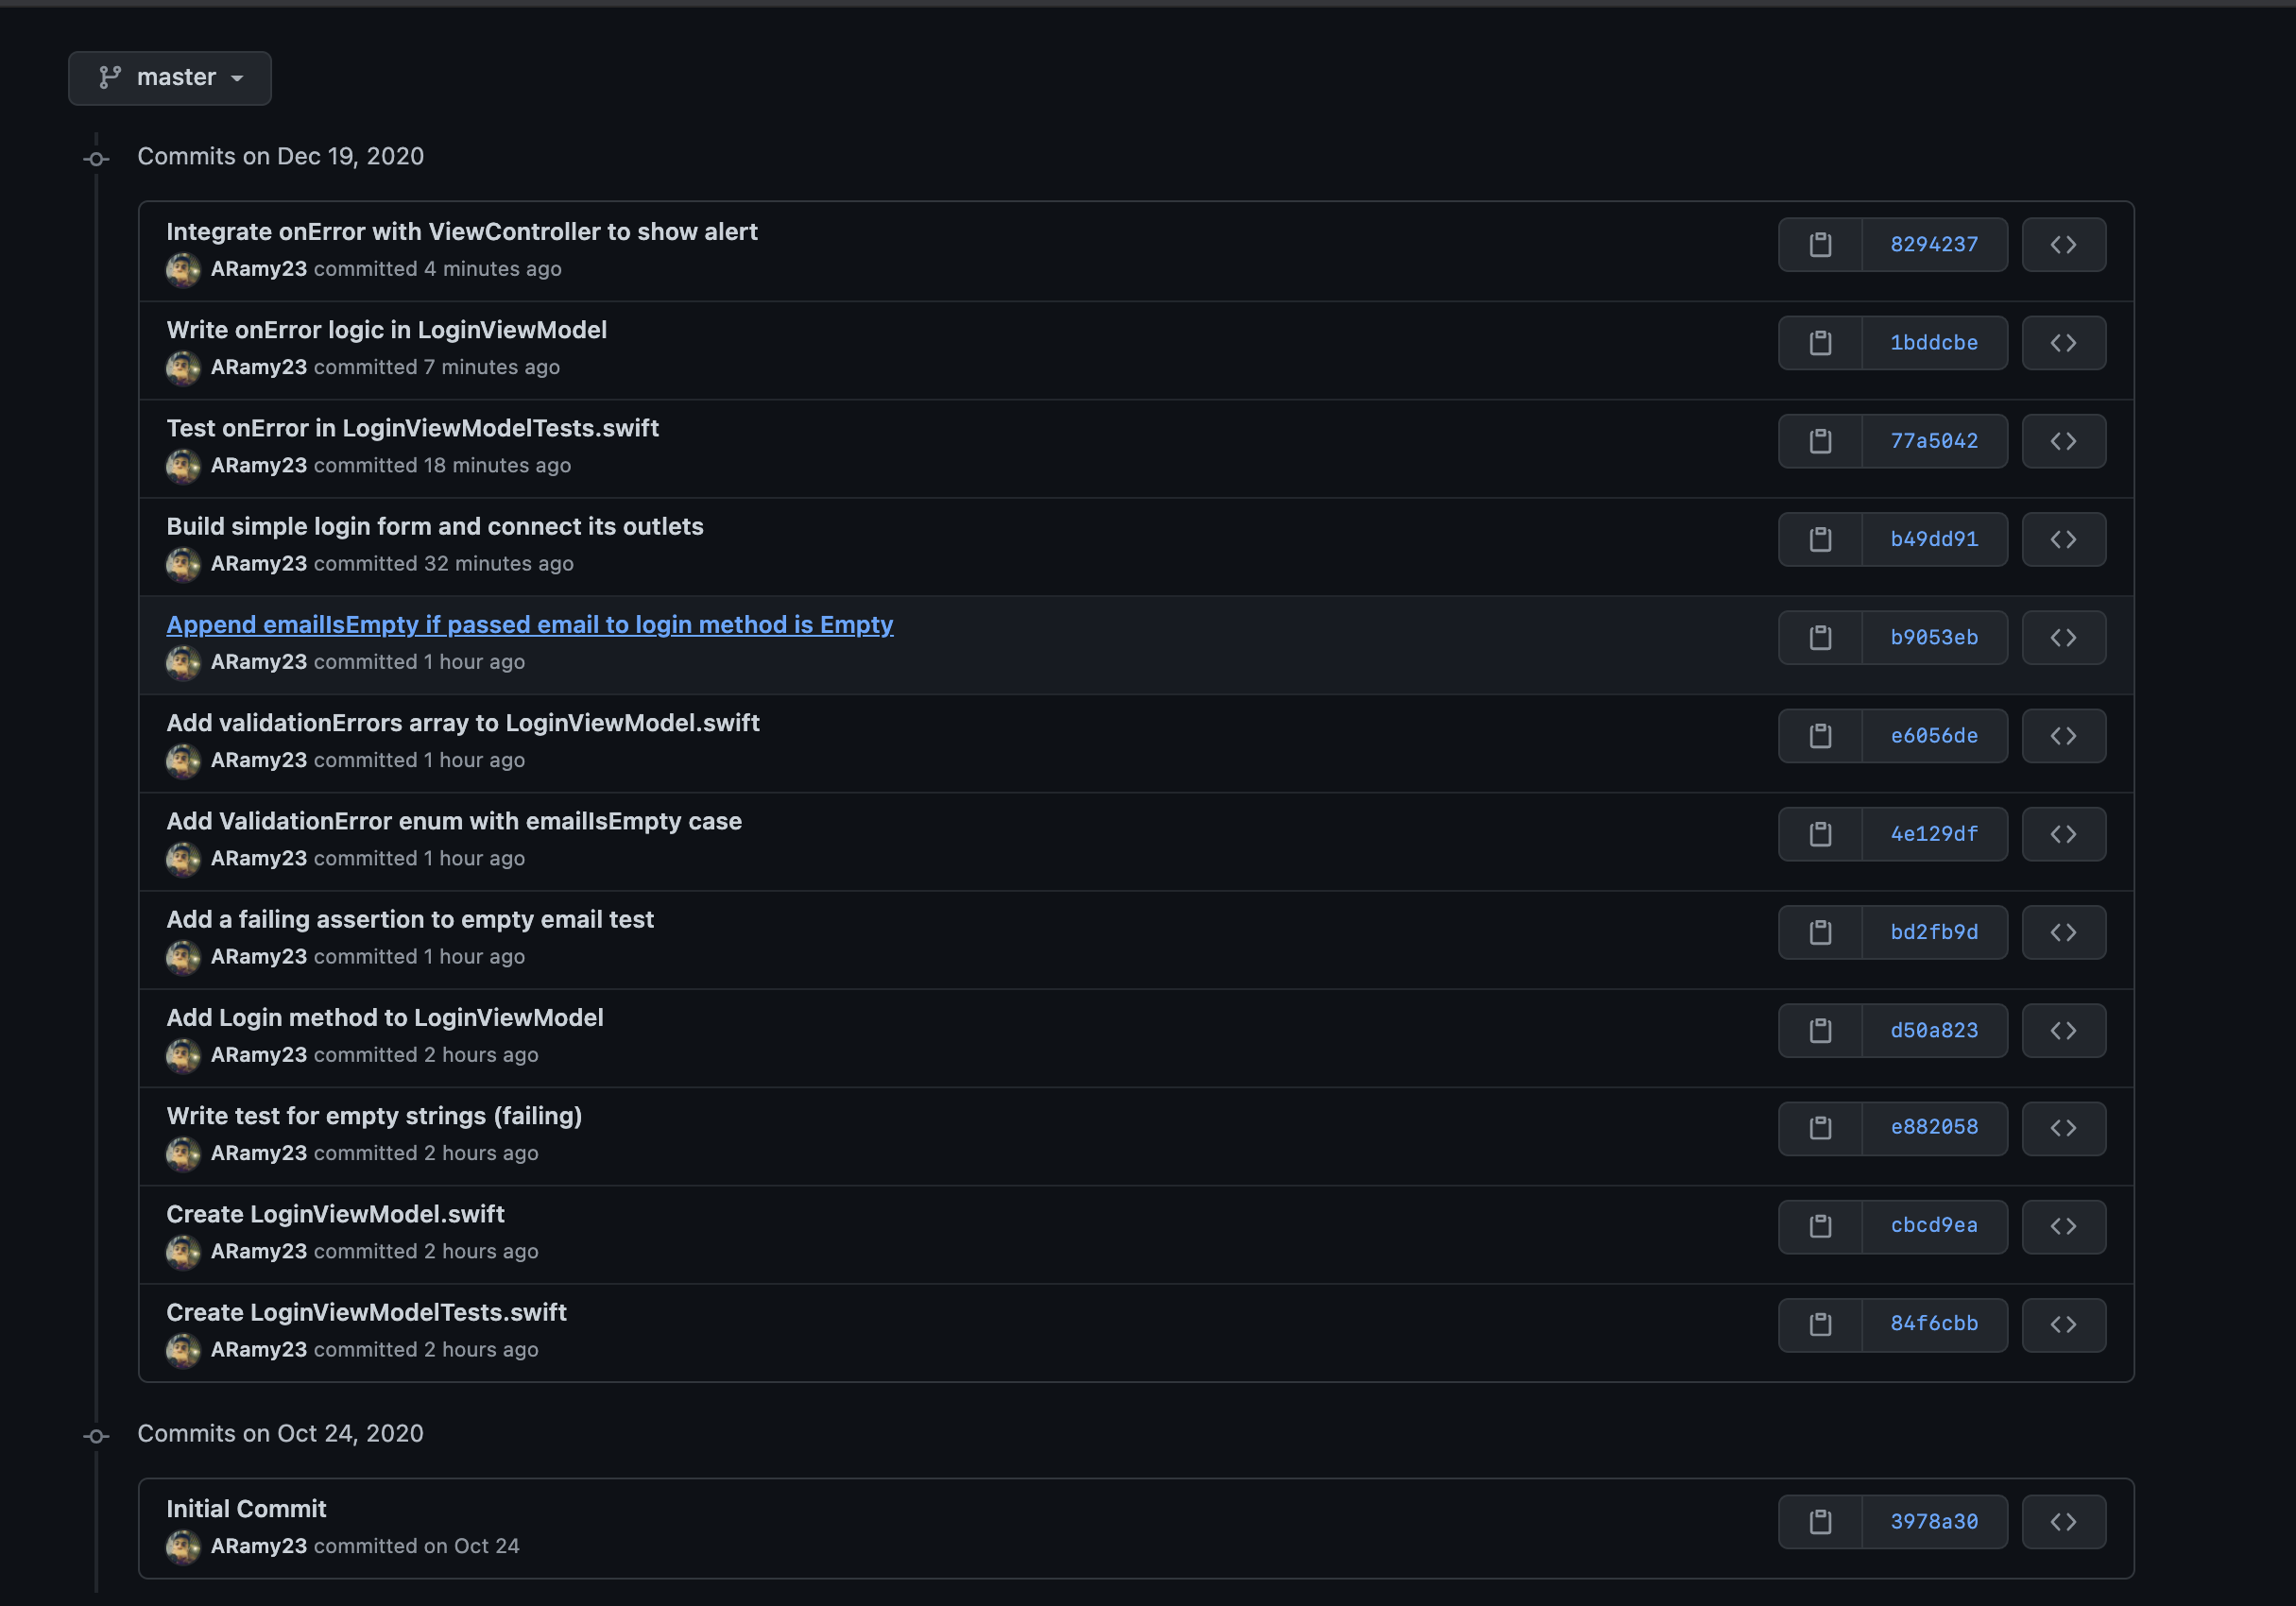
You will find that I added a commit for every step we did, why is this helpful? because sometimes I'd like to get back to the most stable version of the code, and its a good practice to keep your work small and tiny so that if you ever need to cherry-pick something, it's applicable


